Enable DNSSEC signing in Amazon Route 53 using AWS CDK
DNSSEC (Domain Security Extensions) adds security features to the DNS protocol so that DNS resolvers can verify that the data came from the specific zone and validate that it has not been tampered with in transit. In this post I will explain how to enable DNSSEC signing in Amazon Route 53, not via the Console, but using AWS CDK.
Preparation
Consider the preparation steps mentioned under Step 1 in this developer guide.
Customer Managed Key
First, you will need to create a stack that creates a Customer Managed Key in AWS KMS (Key Management Service). It is important that this stack and the key is created in N.Virginia region (us-east-1).
These are the imports needed (this is for CDK V1, make the necessary changes for CDK V2)
import * as cdk from '@aws-cdk/core';
import * as iam from '@aws-cdk/aws-iam';
import * as kms from '@aws-cdk/aws-kms';
Create the key with the right cryptographic configuration (ECC_NIST_P256) and the correct cryptographic operations for which the key can be used (SIGN_VERIFY).
const dnssecKeyAlias = 'example-com-dnssec-key';

const dnssecKey = new kms.Key(this, 'dnssec-key', {
  enableKeyRotation: false,
  removalPolicy: cdk.RemovalPolicy.DESTROY,
  alias: dnssecKeyAlias,
  keySpec: kms.KeySpec.ECC_NIST_P256,
  keyUsage: kms.KeyUsage.SIGN_VERIFY,
});
Give Route 53 DNSSEC Service the necessary permissions in order to use the key.
dnssecKey.addToResourcePolicy(new iam.PolicyStatement({
  sid: "Allow Route 53 DNSSEC Service",
  effect: iam.Effect.ALLOW,
  principals: [
    new iam.ServicePrincipal("dnssec-route53.amazonaws.com")
  ],
  actions: [
    "kms:DescribeKey",
    "kms:GetPublicKey",
    "kms:Sign"
  ],
  resources: ["*"],
  conditions: {
    "StringEquals": {
      "aws:SourceAccount": cdk.Aws.ACCOUNT_ID
    }
  }
}));

dnssecKey.addToResourcePolicy(new iam.PolicyStatement({
  sid: "Allow Route 53 DNSSEC to CreateGrant",
  effect: iam.Effect.ALLOW,
  principals: [
    new iam.ServicePrincipal("dnssec-route53.amazonaws.com")
  ],
  actions: [
    "kms:CreateGrant"
  ],
  resources: ["*"],
  conditions: {
    "StringEquals": {
      "aws:SourceAccount": cdk.Aws.ACCOUNT_ID
    },
    "Bool": {
      "kms:GrantIsForAWSResource": true
    }
  }
}));
Enable DNSSEC signing
Now we go back to the stack where you have defined your hosted zone. This can be the same or a different stack, and it does not need to be deployed in N.Virginia. The imports needed are
import * as cdk from '@aws-cdk/core';
import * as route53 from '@aws-cdk/aws-route53';
In my case, the two stacks are in two different regions, so I have hard-coded the key alias. You can use other ways of sharing the key ARN between stacks, for example, if they are in the same region you can export and then import the ARN.
const dnssecKeyAlias = 'example-com-dnssec-key';

const zone = new route53.PublicHostedZone(this, 'zone-example-com', {
  zoneName: 'example.com'
});
Create a Key Signing Key (KSK)
const keySigningKey = new route53.CfnKeySigningKey(this, 'route-53-key-signing-key', {
  hostedZoneId: zone.hostedZoneId,
  keyManagementServiceArn: `arn:aws:kms:us-east-1:${cdk.Aws.ACCOUNT_ID}:alias/${dnssecKeyAlias}`,
  name: 'ExampleComKeySigningKey',
  status: 'ACTIVE',
});
and then associate the KSK with the hosted zone.
const dnssec = new route53.CfnDNSSEC(this, 'zone-example-com-dnssec', {
  hostedZoneId: zone.hostedZoneId
});
dnssec.node.addDependency(keySigningKey);
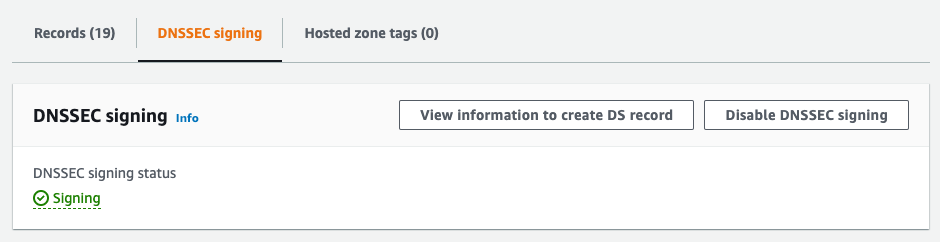
Verify in the console that DNSSEC Signing has been enabled for your hosted zone.
Establish a chain of trust
This is the only manual step and will vary depending on your domain registrar or whether you own the parent domain.
In the console, in the screen shown above, click View Information to create DS record and follow the instructions to Establish a chain of trust. On this page, you can find the public key, the key type (flags field), the signing algorithm and the DS record.
If Route 53 is your registrar, in a new tab go to Registered Domains, open your domain page, and under DNSSEC status click Manage Keys. Select the correct algorithm (shown on the information page) and copy and paste your public key.
If you own the parent domain, then you should create a DS (Delegation Signer) record in the parent zone that you control.
const parentZone = route53.HostedZone.fromLookup(this, 'parent-zone', {
  domainName: 'example.com'
});

new route53.DsRecord(this, 'my-subdomain-delegation-signer', {
  zone: parentZone,
  recordName: 'my-subdomain',
  values: [
    '<DS record copied from the console>'
  ],
  ttl: cdk.Duration.seconds(3600)
});
Verify that DNSSEC is enabled
Finally, you can verify that DNSSEC is enabled with the command line tool dig.
Find your name servers
dig codiply.com. NS
and then query one of them with +dnssec (prepend @ before the name server address)
dig codiply.com. +dnssec @ns-477.awsdns-59.com.
If DNSSEC is enabled, in the first few lines of the response you should see ad among the flags listed.
;; flags: qr aa rd ad;
Congratulations, DNSSEC is enabled for your domain!