Side-by-side deployments with AWS CDK
AWS CDK allows you to provision AWS resources in a predictable and repeatable manner. Once you have scripted your infrastructure with CDK, the obvious next step is to deploy multiple copies in different environments. To achieve this, and depending on your definition of environment, you might need to think upfront about how you configure your CDK application and how you name your resources. In this post, I show you how to set up your CDK application in a way that allows you to perform side-by-side deployments in three common scenarios.
The 3 scenarios
These are the 3 different scenarios I want to cater for
deploy multiple copies in different accounts,
deploy multiple copies in different regions in the same account, and
deploy multiple copies side-by-side in the same account and region.
GitHub Repo
All code can be found in this GitHub repo: codiply/cdk-typescript-template-with-config. I will present the main ideas of my approach in this post, and refer you to the GitHub repo for the exact implementation of these ideas.
I have built my CDK template on top of the CDK sample app. I have also borrowed code from this post that describes several ways of configuring your CDK application.
My goal
My goal is to be able to deploy to a specific environment (for example dev) with the following command
cdk deploy --all -c config=dev
In case no value is given for the config, I choose to default to the default config. This is convenient when I develop a new application and I only have a single environment.
Configuration files
I am using YAML configuration files placed in folder config/. Each environment has 2 configuration files, for example for environment dev I have
dev.deployment.yaml
dev.yaml
The dev.deployment.yaml contains the account ID, the region, and a prefix that allows me to deploy stacks in the same region and account. Later on, I will explain how this prefix is used.
AWSAccountID: "123456789"
AWSRegion: "eu-west-1"
Prefix: "dev"
I have chosen to ignore this file in .gitignore and instead place a template for other developers to copy, modify and use in their deployments. This is also because I don't want to commit this file with my account ID. Depending on your needs, for example if you are in an organisation where everyone uses the same accounts for each environment, you might choose to put this file under source control.
The account and region information is passed into the CDK stacks as an environment. This gives me the peace of mind that I will not accidentally deploy my stacks to the wrong account by using the wrong AWS profile.
The dev.yaml file contains the configuration for the different stacks. Each stack has its own section.
Sns:
  TopicName: 'my-sns-topic'
Sqs:
  QueueName: 'my-sqs-queue'
Loading the right config
To see how these configuration files are loaded, see bin/index.ts and lib/config/config.ts.
In the code, I end up with a Config that looks like this
export interface Config {
    readonly Deployment: DeploymentConfig;
    readonly Sns: SnsConfig;
    readonly Sqs: SqsConfig;
}

export interface DeploymentConfig
{
    readonly AWSAccountID : string;
    readonly AWSRegion : string;
    readonly Prefix: string;
}
Naming resources
In order to be able to do side-by-side deployments, I have to follow a religious naming process when
naming the stacks,
naming resources within a stack, and
naming the outputs that I export from stacks.
Stacks need to have unique names when deployed in the same region. For this reason, I prepend the prefix to all stack names.
new SqsQueueStack(app, `${config.Deployment.Prefix}SqsQueueStack`, config.Deployment, config.Sqs, { env: env});
new SnsTopicStack(app, `${config.Deployment.Prefix}SnsTopicStack`, config.Deployment, config.Sns, { env: env });
Resources need to have unique names so that you can create several of them in the same region and account without conflicts. In some cases, names need to be unique across regions or even across accounts (for example S3 buckets).
const topic = new sns.Topic(this, 'SnsTopic', {
  topicName: `${deployment.Prefix}-${config.TopicName}`
});
For stack exports, and ignoring for a moment the fact that I wouldn't be able to export the same name twice, the names should be specific to the deployment, so that each deployment imports the values from the same deployment. In my example of an SNS topic with an SQS subscription, the goal is to import the SNS topic ARN from the same deployment.
I use the prefix in the export
new cdk.CfnOutput(this, 'export-sns-topic-arn', {
  exportName: `${deployment.Prefix}-sns-topic-arn`,
  value: topic.topicArn
});
and use the same naming convention in the import
const topicArn = cdk.Fn.importValue(`${deployment.Prefix}-sns-topic-arn`);
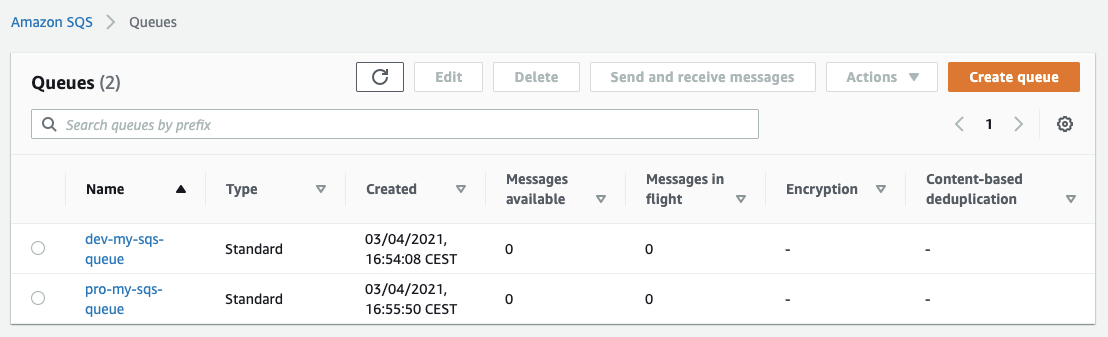
Deploying side-by-side
In my example, I have split the CDK application into 2 stacks (one for SNS and one for SQS), and I have deployed 2 copies of them (dev and pro) in the same account and region. You can see the CloudFormation stacks side by side
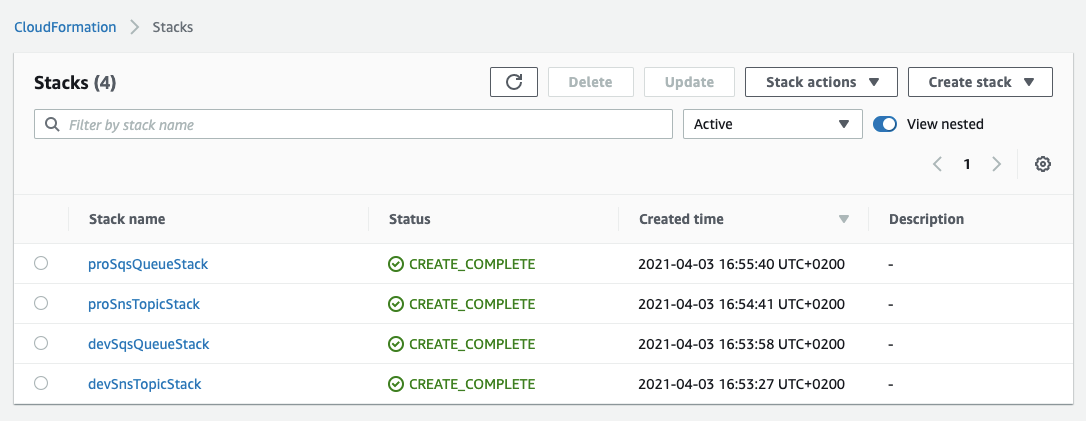
I was able to create side-by-side SNS topics and SQS queues, avoiding any naming conflicts.
Working with an AWS profile
While working with a specific deployment, I prefer not to keep typing
cdk --profile my-aws-profile <cdk command>
For this reason, I have added an aws-profile.txt with the current AWS profile I am using, and instead of cdk, I use a cdk.sh script
#!/bin/bash

set -euo pipefail

cdk --profile $(cat ./config/aws-profile.txt) "${@}"
This way I just type
./ckd.sh <cdk command>
The aws-profile.txt file is also ignored, and a template is provided in the repo. This is a file that is specific to a developer and does not need to be under source control.
Try it for yourself
First, clone codiply/cdk-typescript-template-with-config. This template is creating an SNS topic and an SQS queue, so deploying this project will not cost you anything.
In case you haven't already, setup AWS CDK for Typescript.
Next, you will need to set up 2 deployments, one for dev and one for pro:
Make a copy of
config/dev.deployment.template.yamlintoconfig/dev.deployment.yamland enter your AWS Acount ID and your region.Do the same for
config/pro.deployment.template.yaml, using the same account and region.
Then to deploy all the stacks, run
./cdk.sh deploy --all -c config=dev
and repeat for config=pro. If you are using an AWS profile that is not your default, add --profile <aws profile>.
To clean up, you can either
Run the same commands but with
destroyinstead ofdeploy, orsimply delete the stacks from CloudFormation in AWS Console.
Conclusion
AWS CDK allows you to script your AWS infrastructure and perform repeatable deployments. By configuring your CDK project and naming all resources wisely, you can deploy multiple copies of a stack side by side even in the same account and region.